


My second project in the construction of my Sylvanian village, was to create a beach front to display my Farthing dogs and ice cream wagon! I received the Farthing family as gifts from various friends of mine, and that makes them very special to me. :-)
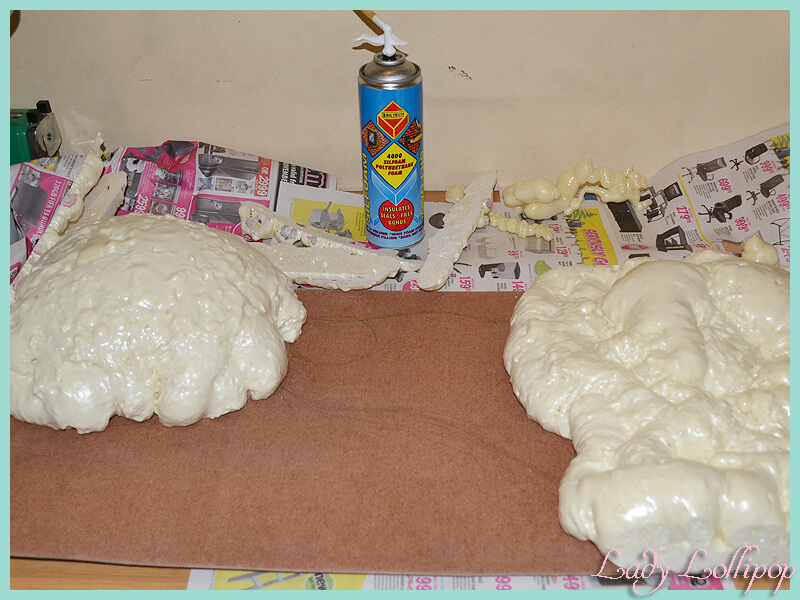
I used expanding foam crack sealant to make my rocks and it worked like a charm. It is firm enough to sculpt with ease, but soft enough to mould and shape with a knife or box cutter. The cutting and shaping was the fun part and it took some running back and forth to measure the best fit for my cabinet's shelf.
The original idea was to have some rock pools on the right hand side, but a turn of events initiated by my darling husband led to the are being flattened to make space for food vendors. After all, what is a beach without food? And I REALLY did not want to find out just how bad the wrath of an angry Chocolate rabbit could be - especially a hungry one...
I tried to make a little lighthouse made from a Pringles container. Since the official Sylvanian Families Starry Point Lighthouse would only be released a full six years after I built this diorama, this was the best that I could come up with at the time. The crisps were quite horrid, but it was worth it to get the container, which is very sturdy and just the right height to fit into my cabinet! I didn't have much space to work with, as my cabinet isn't all that high, so I needed to make sure the the lighthouse didn't go too high to fit into the available space, and ended with this squished down one.

I used cardboard from an old veggie box and the railing was made of really thick kebab sticks. The roof still needs some work, but it isn't too bad for a first try!

I used cardboard from an old veggie box and the railing was made of really thick kebab sticks. The roof still needs some work, but it isn't too bad for a first try!
This is what the lighthouse looks like when I place it on its final spot. It still had some leveling and carving, but you get the overall idea. The foam has some really big holes in places, but I decided to fill them up with exterior crack filler to make the surface seem more like rock. I think that the overall look that the foam gave to the rest of the rock was pretty authentic, so I only carved in some hilights to make the nooks and crannies in the rock more prominent.
At this stage I started going over all of the rocks with my crack filler. It also worked very well to give a texture to the lighthouse walls! I saw a photo of a really lovely little antique lighthouse on Google that had a similar finish to it, so I quite like the rough texture that I managed to get from it.
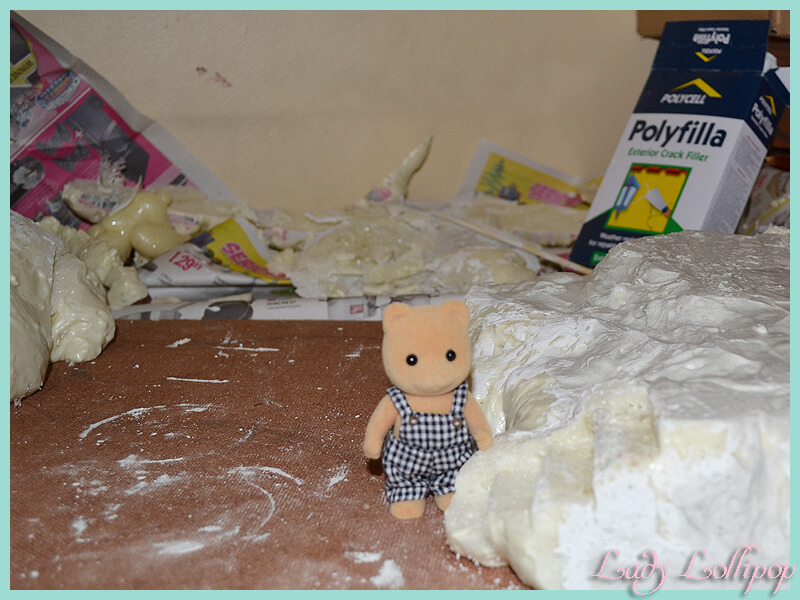
This side of the diorama was filled with some wood glue and excess foam cut from the other rock before being slathered in crack filler. Even though I want a rocky texture, the Sylvanian Families figures do not stand very well on uneven surfaces, and thus I ended up flattening the tops to make up for this.
It took a full day to dry the crack filler thoroughly, but in the end, the finish was very authentic and rock-like. This was supposed to be the area for the ice cream van to stand, but instead it ended up housing the ice cream cart and popcorn cart. After all, two vendors makes for more variety!
In the foreground I carved out some steps for the critters to reach their tasty treats. These steps were supposed to be cut from rock and left for sand and shrubs to take over, but ended up being clad with wooden slats in stead. I quite like the combination of the wood with the sand and rock, but decided not to fiddle too much with stains or paints and to keep the wood unfinished.

This is an overview of the board after I finished painting the sand and sea. In hindsight, I should have opted for a darker blue from the start, but I didn't realize that untill much later...
The sand, sea and everything else for that matter, is painted using acrylic craft paint. It works well, covers well and is relatively cheap. The only downfall is that it dries extremely quickly, so shading has to be done straight away, or as an after effect.
I used shades of gray and white for my rocks, but in my overeager-ness, I didn't take any photos untill the end of my project. I can kick myself sometimes when I don't even follow my own plans.
In the end, I did not like the look of the lighthouse as much as I had hoped, and decided to toss it out in favour of more space. The new sea themed items were just perfect for this shelf and this display has since been ripped apart in favour of revamping it a bit...
The finished project

The turtles and birds that I used for this diorama, are from the "Ocean In my pocket" series that I ordered with foresight to this project. The plants on the rocks are the closest that I can get to beachy plants since a palmtree is much too difficult for me to even attempt right now. The sand was kept in place by glueing two dowel sticks on top of each other to go around the front part of the shelf.
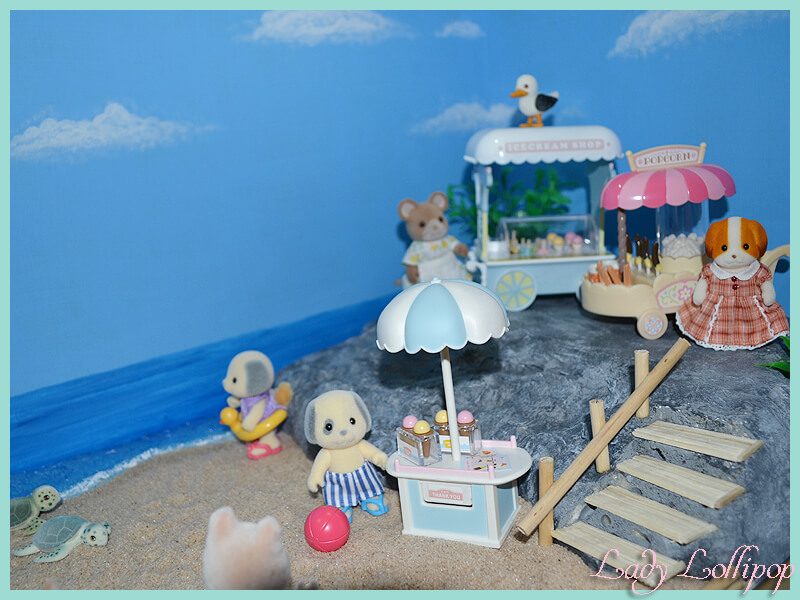
This is a closeup of the area with the food vendors. I decided to have a wider selection of things for my Sylvanians to munch onrather than just the ice cream van. Already the seagulls have come for a look to make sure that they don't miss a tender morsel dropped by an unsuspecting Sylvanian critter.
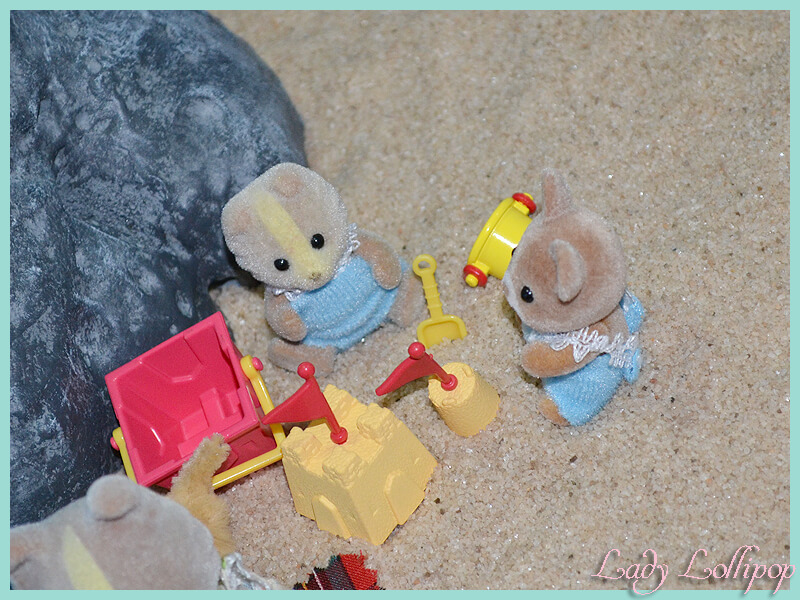
Here we even have some little critters building sandcastles while their parents enjoy a beach picnic.
I think the Sylvanian Families of Rooibosch Hill are going to enjoy their new beach front for many years yet to come.

