I have received many requests to create a tutorial for customizing your own Sylvanian Families Cheetah and if having your own little cheetah in your village is one of your goals, then this tutorial is for you!
Items Needed
Secondhand/Damaged Sylvanian Families or Calico Critters bear figures with a light coat (Preferably Easy Buy); Acrylic paints (Ocher, Ivory, White, Black & Sienna); Fine paintbrush for spots; small sturdy brush (5mm); Soft sponge; Kitchen towel; Clean water; Fluffy craft pipe cleaners (Tan/white); Clear Nylon beading thread/fishing line; Quick drying clear glue; Sharp needle with eye that fits the nylon line (LONGER than the figure's head width!); Sharp tool to stretch hole open for tail implant.
First you need to make sure that your chosen figures are free of dust and any possible oil or other contaminants. I recommend giving them a good wash with cool water and mild soap - DO NOT use harsh detergents, bleach, peroxide, conditioner or fabric softener! They will damage the flocking on Sylvanian Families figures and may even cause the paint to react in harmful ways. Pat dry with a soft towel to remove excess water and leave to dry in the sun.
I used a set of Easy Buy Bears for my cheetah family, but you can use any other light bear figures in the little bear mold for this project. From my photos, you will see that my bears do not have even coloured flocking and that was the big reason why I chose them to experiment on in the first place. The Easy Buy bears also don't have very good flocking, especially under their arms and at the joints, so the finished cheetahs still have some of the base plastic showing through in places because of this.
When your Sylvanian Families critters are clean and dry, you can begin painting with your 5mm brush. I use a sturdy sable brush for this, since it holds up well with the blotting and dry brusing. I blot my paint onto the kitchen towel when I start working and then use the paint brush to dip into the paint and dab around a clean piece of kitchen towel until it is almost dry before painting on my critters. Beware of using too much paint at a time, since this will result in your flocking getting hard and matted. We only want to color the flocking, and leaving too much paint in is not a good idea. I used the Sienna first, followed by the Ocher until I was happy that the flocking was thoroughly colored.
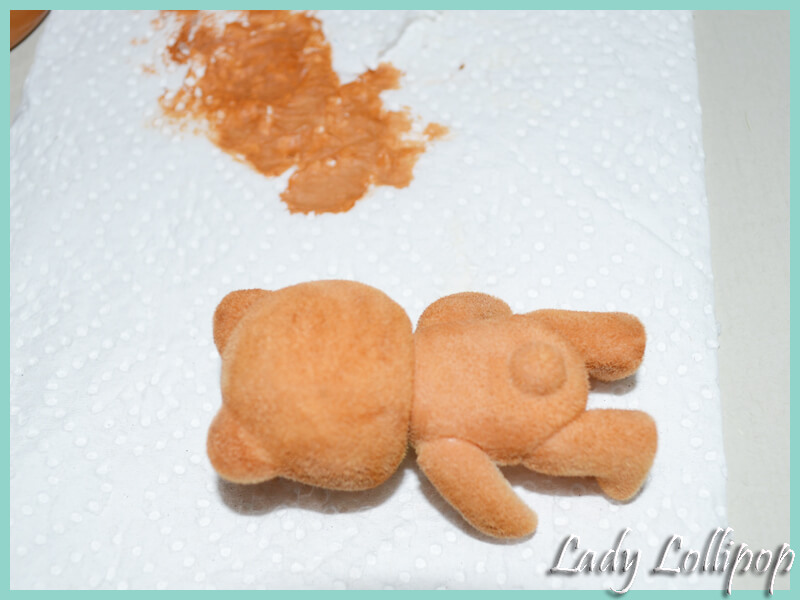
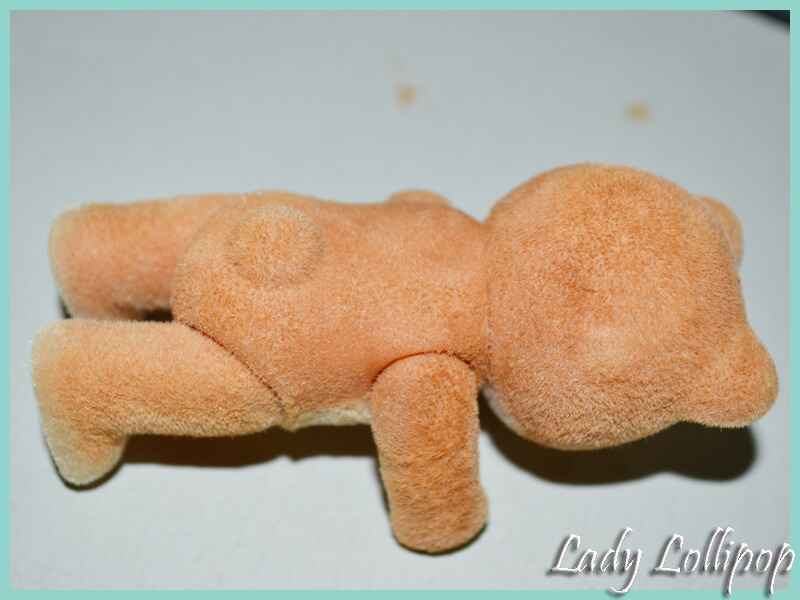
If you look closely in the photo above, you will see that the figure still has some uneven paint spots where the paint is wet - now use your sponge to gently work the wet paint into the flocking. DO NOT rub, since you will damage the flocking! The aim is to remove the excess paint and to give your critter's new layer of paint a good even finish.
Go slowly, work in a small area at a time and repeat this for the whole backside of the Sylvanian critter.
You will likely need to use a couple of layers of paint, in stead of one thick one in order to spare the flocking.
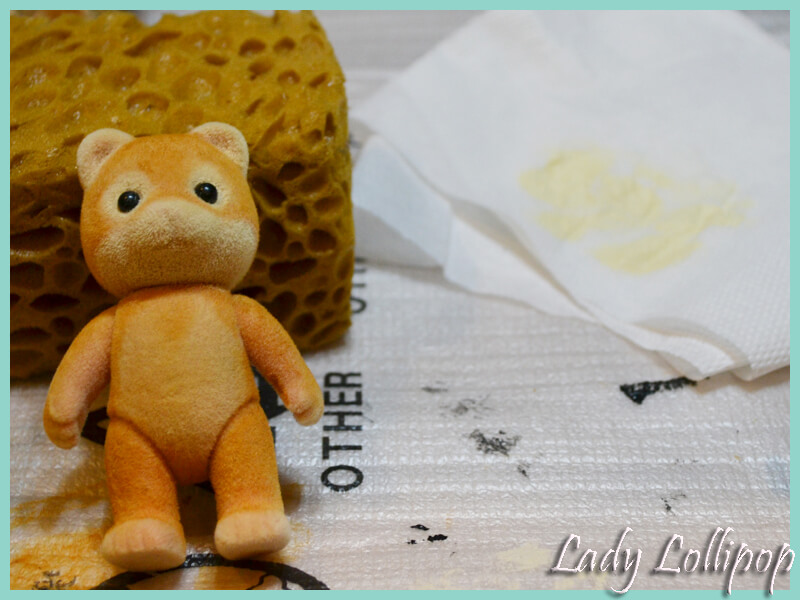
In the above photo, I have tried to show you how the flocking should look when the process is done correctly. This figure's legs and most of his body is dry, while the arms and back of its head still have some wet paint. If you feel that you have too much paint on the figure, you can always dip the sponge into some water to clean it and gently remove some more of the paint. Remember that acrylic paint dries very quickly and you have to use a lot of patience here.
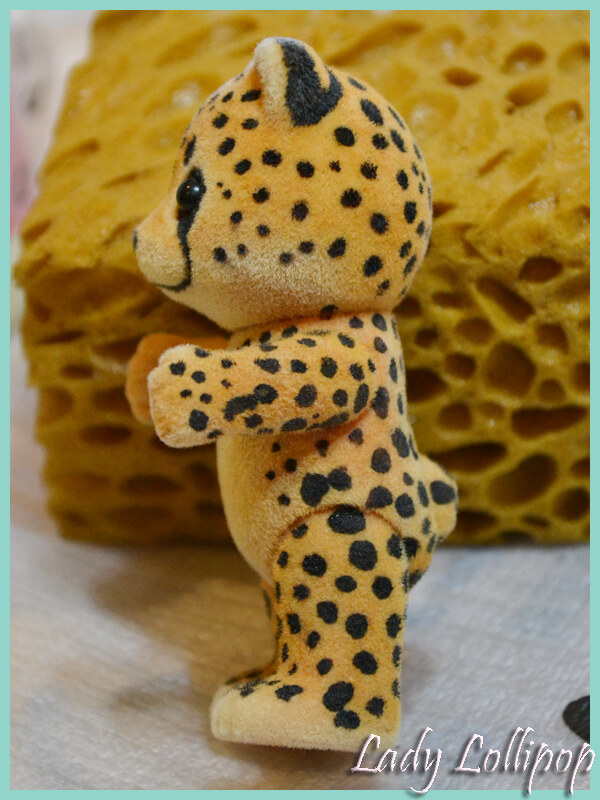
The next step is to start marking out the face of your cheetah. I recommend that you keep a photo of a real live cheetah nearby for referance to colours, spot patterns and facial markings for your Sylvanian figure. Leave the insides of the ears in the lighter color, as well as tear shaped spots over each eye and the underside of your cheetah's muzzle. Above is a close up of the shape that I felt worked best for the cheetah.
Paint the rest of your cheetah's face, as well as the front of his body, leaving the stomach area, front of his toes and under his arms in the original lighter color. Sylvanian Families and Calico Critters are not often painted on their arms, legs or bellies, but I feel that it adds a nice touch to the figures.
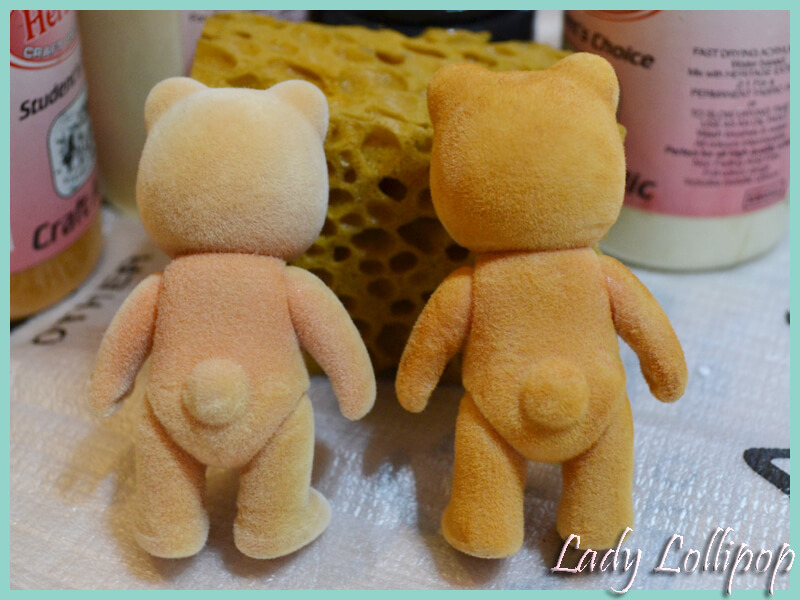
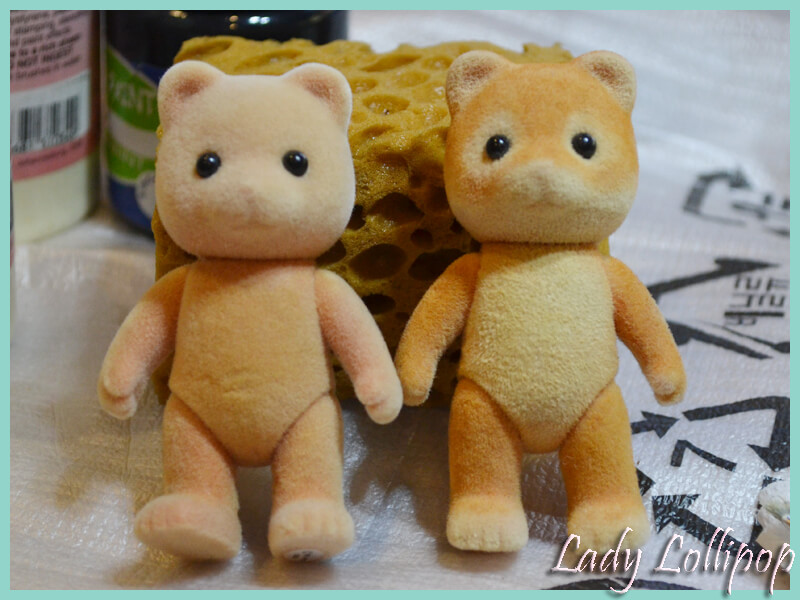
When you are done, your figure should look something like the one above. Note the difference in color on my figures' stomach area. Left is the unpainted version, which also has a much darker patch on its stomach! The Easy Buy critters do look much better with clothes on though!
Try to get an even color all over your Sylvanian cheetah figure by adding more layers as you go along. It is best to leave the critter to dry completely between each coat of paint and if needed between the different areas as well, to prevent paint smudges and excess paint in the flocking.
I really can't stress this enough!!! If you want a soft feel to your finished critter, you NEED TO go slowly at all times!
Next up, you need to start adding the hilights to your cheetah. Make sure that the figure is dry before starting and slowly add some of the ivory to the inside of your figure's ears, around his eyes and on the blank part of his muzzle. In the photo above, you will see that the eye on the right has already been painted, while the eye on the left is still blank.
As you go along, make sure to dab your figure's eyes clean with a soft cloth. Do not let the paint dry on the eyes. If your figure has scratched eyes, the paint is very difficult to remove later, so clean it off before it dries. If your figure has scratches on its eyes, you can go over them with a fine nail buff to remove any deep scratches, then paint over a coat of clear nail varnish when you are done painting. It is also possible to remove and replace the eyes on a Sylvanian Families or Calico Critters figure, but finding the correct size eyes from dollmaker shops is difficult.
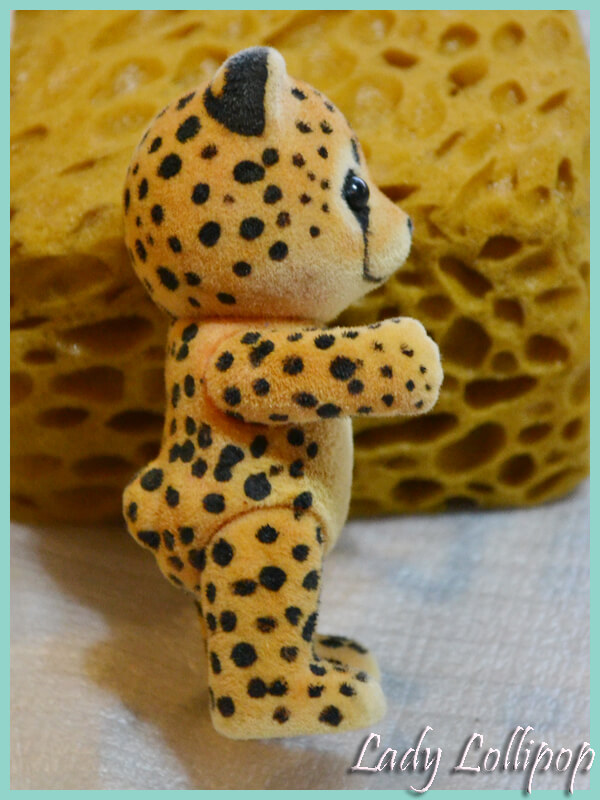
The above photo shows the positions of the hilights that I added to my cheetah family. The inside of their hands and arms are also lighter. If you feel that your ivory does not make the figure light enough, you can dry brush a layer of white on as well, but I prefer to end with an ivory layer as it gives a softer look to the figure.
Once the flocking is dry and you have cleaned your figure's eyes, it is time to start adding the spots...
Outline your cheetah's eyes with a very thin line of black all around them. You don't want to make your cheetah look like a goth! Follow the figure's natural curve for the tear stripes and lips and paint on a little black nose. Make two little oblong spots right above the cheetah's eyes, then start adding a few tiny dots of black paint to the outside of the face. The dots should get progressively bigger until you reach the back of the figure's head where the spots are the same size as on the cheetah's body.
After your cheetah's face is dry, you have to start on the ears. The three photos above show the shapa and pattern needed for the ears. I found this part quite tricky, since the flocking was much thicker on my figure's head than on its body. You can see that the spots look much neater on the body, while they are a little out of shape on the feet and head - this is due to differences in flocking thickness on Sylvanian Families figures and can be corrected later with another thin layer of paint.
For the spots, you will need to use more paint than before. I dabbed on the paint spots, then pressed a sponge onto the painted area very gently, making sure that you don't smudge the paint and only apply downward pressure to the figure. Wash the sponge to remove ALL traces of paint before dabbing another area. The big craft sponge in the photos was only used for propping my figures up - I used my son's baby bath sponge for dabbing at the paint.
Now that your figure is dry, it is time to move on to the tails and whiskers. This is the tricky part and I think the tails posed the biggest challenge for me... I ended up using craft pipe cleaners that I painted. I worked the paint into them with my fingers and separated the bristles with the sponge as the pipe cleaners dried. I cut my pipe cleaners into three strips for tails before moving on to the next step.
When the base coat of paint is dry, paint the bottom of your tail with the ivory using your dry brush technique as discussed above. I painted about a cm for the kids' tails and 1,5cm for the adult tails. Leave your ivory tipped tails to dry before adding the spots and stripes. Using a little more paint on your brush, paint the tip of your cheetah tail black, leave a stripe of ivory, then paint a black stripe - repeat this once more and leave to dry...
Once dry, you can move on to dabbing random spots of black paint into the tail. This is a little tricky, but after a few tries, you should have a perfect little cheetah tail! Remember to paint the tail to the very bottom, since you want the spots to begin as soon as the tail leaves your figure's body.
When your spots have dried, add a little bit of white paint to the ivory stripes, to give them more definition. The tails are now ready to be implanted as soon as they are dry. This is not easy, since the wire inside the tails is not very hard and easily bends. Firstly you will need to cut your tail to the desired length. My tails are roughly the lenth of a Sylvanian when inserted and are inserted roughly an arm's depth into the body.
However, I would recommend that you do your whisker surgery first, since this is a little tricky and can be very fiddly on the smaller child sized figures.
Snip off a piece of nylong and thread your needle. Snip off more than you think you will need - I used about a 30cm piece of nylon to ensure that I don't accidentally pull it all the way through when I get the whiskers in, since you really only have one go at each critter's whiskers. Pull the ends of your nylon thread together, so that the needle now neatly sit in the middle of the thread, then press the middle of the thread together firmy to create a bend for the needle to sit in.
Next you have to mark the position of your whiskers and line them up so that the entry and exit points for your needle are in as straight a line as possible. If you take a look at a Sylvanian cat or Hamilton hamster, you will see that their whiskers are not always straight and they don't always come out of the same place on either side of their head... You will know why in a second! My Hamilton hamster girl had her whiskers pulled through nearly to one side when I got her and this is how I realised that they are stuck in my hand - very likely with the same method as we are going to use now!
While you have your needle lined up and aimed at your entry point on the figure's face, start applying gentle pressure until you see the needle going into the plastic. (PLEASE CONSULT A GROWN UP IF YOU ARE A MINOR - and if possible, pawn this part off on an unsuspecting spouse / partner / friend with big, strong hands!!!) It is important to go SLOWLY and to get your aim as straight as possible through the figure's head to the other side.
When you feel that the needle has gone through the first layer of plastic, push it through the void on the inside of the head very slowly while still keeping the level as straight as possible. You will feel once the needle hits the other side of the head, as it will be very tough to push through from here on out.
I placed the end of the needle on my hard working surface and pressed the figure into it slowly from above. I found that it gave me more leverage to get the needle through. Once you see the tip of the needle protruding from the other side of the critter's face, it is your one and only chance to make adjustments of the position (BEFORE the needle sticks all the way through, so that the extra hole will be small enough to cover with flocking!!!)
When you are happy with the second position of your whiskers, push the needle through slowly until it is almost all the way through. BE CAREFUL of pulling the needle out all the way, since you want the nylon whiskers to stay behind! The needle tends to POP out at an amazing speed once it is all the way through the plastic!
Once your needle is through, give your whiskers a little tug to position them and cut off the excess. I found that my whiskers were secure enough if I used the right sized needle and I didn'tdab any superglue on them to keep them in place. In fact, the holes in the figures tend to close up aound the whiskers pretty well and they are naturally held in place. If not, your needle was most likely too big and you will need a little drop of glue into the holes on either side to keep the whiskers from falling out.
Now that your new Sylvanian families Cheetah figure has its whiskers, all that is left for you to do, is to do their tail implants!
If you are using an Easy Buy bear for your remodel, you will find a little stub molded into the plastic. Take your sharp needle and poke a hole right through the middle of this bump. If you are using a standard Sylvanian Families figure, you will find a little hole or indentation in the plastic where the tail goes - you will need to remove any existing tails though and this may leave some glue residue. Lay your figure flat on his front on a soft towel to prevent damage to the flocking and to keep him steady and push the needle in slowly.
Keep working your tail into the hole until it is about a Sylvanian arm's lenth inside the body. At this stage the tail should not come out too easily when lightly tugged. Secure your tail by adding a drop of superglue to the base. Be careful not to add too much, since you will harden the tail and flocking.
Leave any glue to dry completely before handling your new figure. Now all that is left for you to do, is to dress your new critter and think up an interesting name and back story for him / her! I hope that you found this tutorial useful. If you find anyting unclear, please feel free to drop me an email and I will elaborate.