


I received a set of Cottontail rabbit grandparents in one of those magical boxes of second-hand Sylvanian Families. They were in fairly good condition, but they didn't have their glasses and their tails were badly damaged. At least their flocking is still in good condition and they are both in their original outfits. At first, I made my own sets of glasses out of beading wire for them to wear untill I finally managed to buy them each a set on Ebay.
Finding a set of glasses solved my first problem, but their tails were still in very bad shape. So, I decided to have them undergo a little operation to remedy this.

I found a few gray pompoms at my local arts and crafts store. They are roughly the right size and their colour is very similar to the original ones! They aren't really expensive and I got a whole bunch of them for next to nothing. They are usually in the kiddies craft sections of the craft stores.
My first problem, was removing the original tail an all of the glue that kept it in place. The old glue still sticks like crazy, but the little pompom tails start getting more and more fluffy with serious play.

You need to use a sharp knife with a sturdy blade to pry the glue free from the flocking. Be careful not to hurt yourself, this is quite a tedious process and you would be amazed at how much force is needed to pry the glue loose. Work slowly and you will manage to keep most, if not all of the original flocking intact. This process took me a good 20 minutes per tail to get it done properly and to make sure that the figure doesn't get hurt!

This is how my Sylvanian looked with all of the old tail fluff removed. The ball on the right, is the ball of fluff that started pulling out from age - it removed quite easily when tugged a bit. The ball on the left, is the piece of fluff that was still left after I removed the fluff that came loose. It has most of the glue still stuck to it.
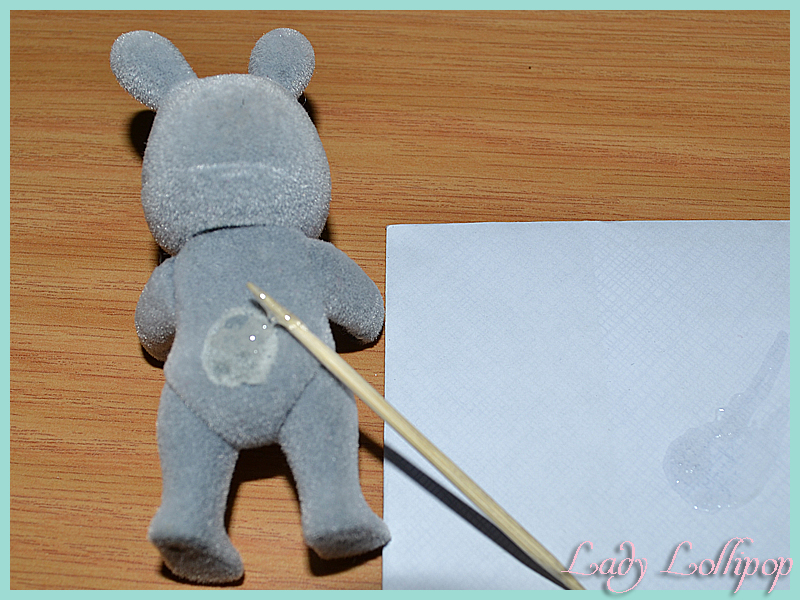
I used clear Epoxy to stick the tails back onto my Sylvanians. It sets very quickly and is a very strong glue. Super glue and nail glue also work sort of, but be warned that it will seep into the flocking and harden it. It is also easier to put the glue onto your Sylvanian in exactly the same place as the original glue was - just leave a slight gap on the outside of your blob of glue so that when you press the tail down, the glue will spread out to where it was originally.
Whatever glue you use, make sure that it is strong enough to hold the tail in place - paper glue and most craft glues mostly designed for paper or sticking things to paper will not work. Try to stick to a glue that sets clear and doesn't seep into the flocking. ALWAYS test on both materials that you are going to stick first!!! Do a little patch test in the middle of the area you are going to stick the tail if you don't have an old Sylvanian laying around to test on, as some glues damage the plastic. Also make sure that you are in a well ventilated area, preferably outside or at least with an open window.

Let your project set according to the manufacturer's instructions. I put a bit of pressure on my tail by pressing it down between my thumb and forefinger for a bit. You will most likely need to press the pompom tail a bit to make sure that the glue spreads out evently and that it has covered enough of the pompom to stick it to the figure.
Once your glue is dry, your Sylvanian will have a brand new tail!
